


Download a PDF copy
introduction
As the blockchain wars continue to intensify in the second quarter of 2021, yield farming is no longer an activity reserved only for Ethereum users. The simple act of putting your wealth into a platform to earn more tokens has quickly become popular on other blockchains such as Binance Smart Chain and more recently Solana.
While not yet reaching the level of participation of other networks, the Solana ecosystem is steadily growing, with projects like Mercurial, Orca, and Raydium drawing unprecedented attention to Solana.
However, the Solana ecosystem can be more difficult for newcomers to connect to and access with the many farms available. Although the blazing-fast speed and low transaction fees make both veterans and retailers very comfortable, just switching networks on Metamask isn’t as easy, and newcomers can be put off by the drastic change in user experience and interaction.
However, bear with us as we bring you this step-by-step guide to crossing the chasm into the Solana blockchain. We will also touch on some of the platforms where you can start your yield farming adventure.
how to start
Before you embark on your journey, you need a wallet to store your money. Unlike most blockchains, which can be accessed using a regular metamask or hardware wallet like Ledger or Trezor, there are various wallets you can choose from that can be used to store funds on Solana. These wallets include Sollet, Solong, and MathWallet.
These wallets are all non-custodial, meaning you are responsible for your funds, and they can be used to receive and send SOL or other Solana Library (SPL) tokens. While all of them can be used with little to no issues, we recommend using the Sollet wallet created by the Project Serum team, as it works with most, if not all, of the projects currently live on Solana. is highly compatible. Below is a step-by-step guide on how to create a Sollet web wallet.
How to create a Sollet web wallet
Step 1: Go to https://www.sollet.io/. If this is your first time doing this, you will be prompted to create a new wallet. You will be presented with 24 seed words that you need to restore your wallet in case you lose access to it.
Once you have verified that your seed words have been saved correctly, click the checkbox and then click “Continue”. You can also choose to restore an existing wallet instead if you already have a Solana wallet created elsewhere.
Step 2: Next, you can add a password for an extra layer of security. Enter and confirm your password before creating your wallet. You can skip the password step and create your wallet right away. However, we recommend choosing a password to reduce the risk of losing money.

Step 3: Congratulations, your wallet has been created! Here you can see your balance on your account and the respective addresses.
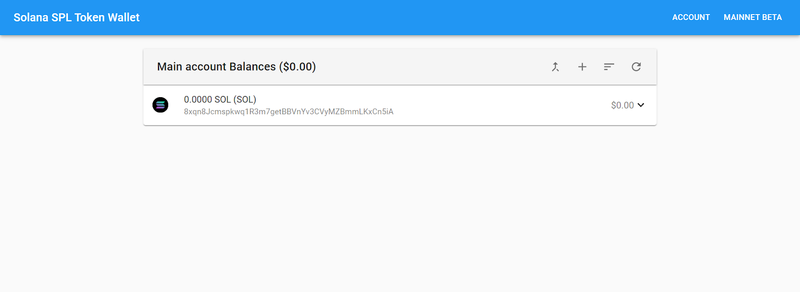
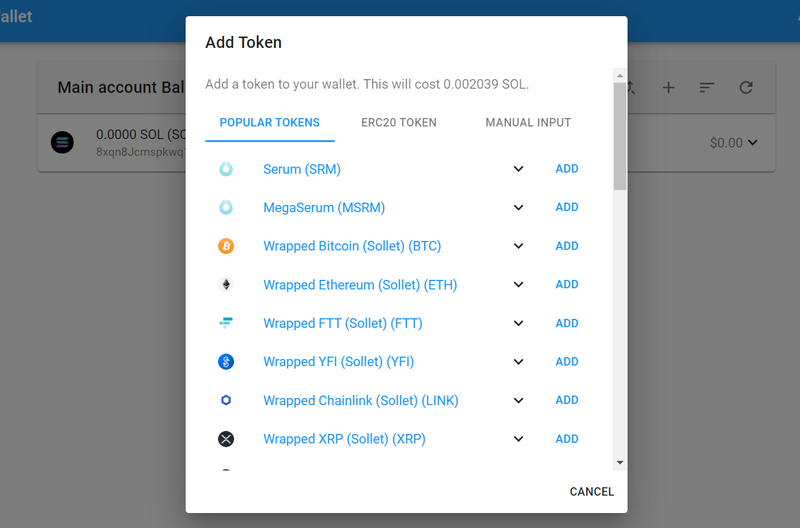
Step 4: Note that unlike traditional wallets on Metamask with a unique address, you have different addresses for receiving and sending different assets through the Solana blockchain. To add a token, click the “+” icon and you will be prompted with a selection of tokens to choose from, or you can add the token by manually entering the token details. Regardless, adding token addresses costs a small fee to be paid at 0.002039 SOL.
Now that you’ve set up your wallet, it’s time to load it up with funds. Although a cross-chain bridge is currently being built between the Ethereum and Solana networks known as Wormhole, the easiest way to transfer your wealth is via FTX or via the Sollet wallet itself.
-
Transmission of FTX
Step 1: Login to your FTX account and go to your wallet to view your balances. If you do not have an available balance in your FTX account, you can deposit by clicking on “Deposit” for the selected asset.

Step 2: After that, to withdraw from FTX to the Solana blockchain, locate your preferred asset and click Withdraw. In this example we will withdraw USDT.

Step 3: You will get a USDT withdrawal prompt where you need to enter the amount and your USDT address. You can enter an address from one of the supported blockchains listed above in the prompt that FTX would automatically detect, or you can use a previously saved address. When you’re done, enter your 2FA code and click “Withdraw”.
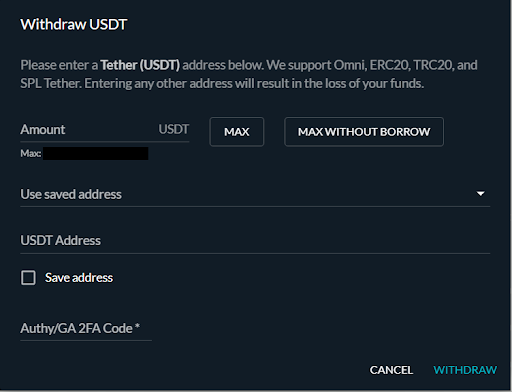
Note that withdrawals to the Solana blockchain are free and you need to make sure you differentiate between the different deposit addresses for wrapped and native tokens. For example, wrapped USDT and native USDT would have different addresses on Solana, as highlighted by the following warning.

Step 4: After clicking “Withdraw”, your withdrawal request will be submitted. You can check the status of the request by going to the Withdrawals tab. After completing the request, make sure the money is safe at the address you provided.

-
Transferring Ethereum via Sollet
Step 1: Alternatively, you can transfer your funds from Ethereum through the Sollet wallet. Select the funds you wish to exchange and click ‘Receive’. In this example we choose USDC.

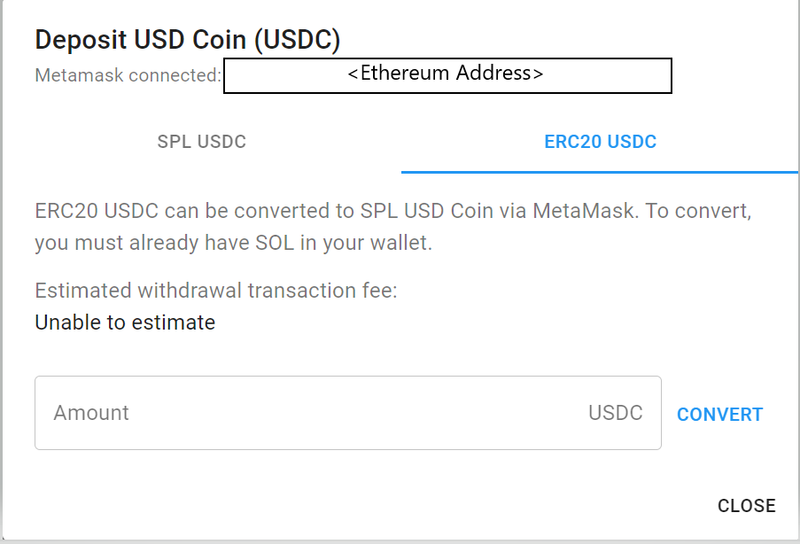
Step 2: After that, you will be presented with two tabs where you will see the deposit options for the asset, SPL USDC or ERC20 USDC. Click on the latter and you will be presented with the estimated withdrawal fee and an option to connect to MetaMask.
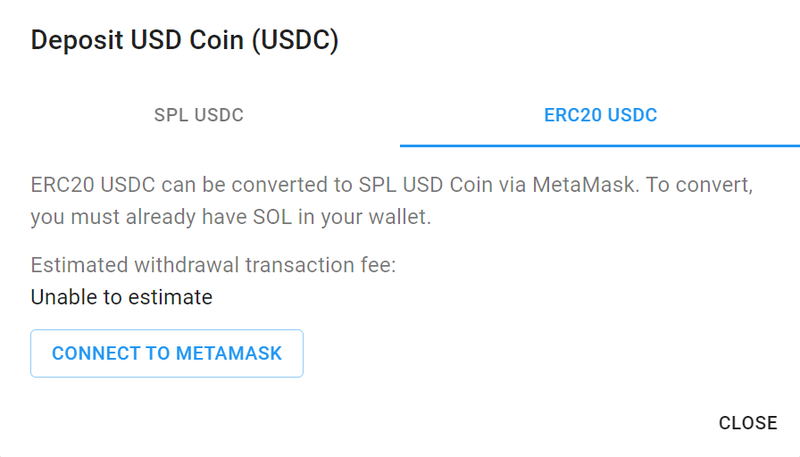
Step 3: After connecting your MetaMask, select the amount you want to exchange and click “Exchange”. You will then receive two prompts from MetaMask – the first is to approve the conversion and the second is to send the money. When you are done confirming the transactions, wait for the funds to be transferred to your Sollet wallet.
And it’s all there! Now you are ready to start farming on Solana. But with such a huge and new ecosystem, you might be wondering where do I even start? Well, before we get into that, let’s take a look at some of the things to expect when interacting with the various dApps on Solana.
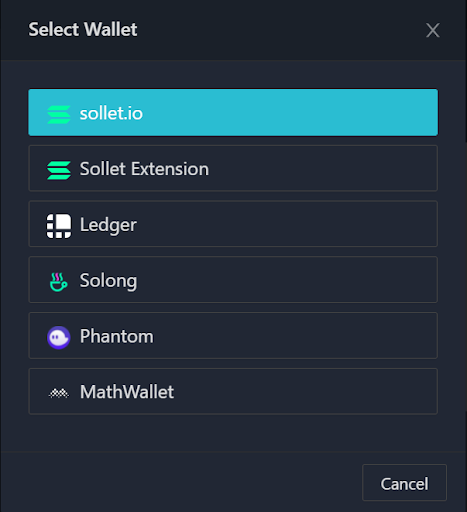
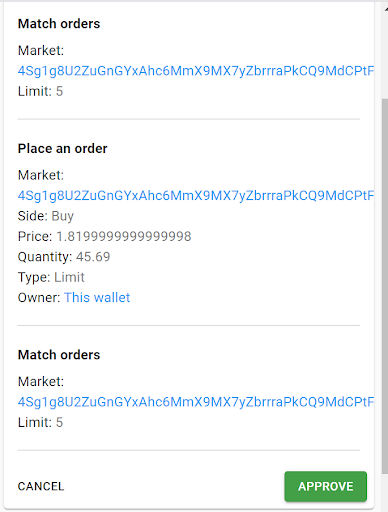
Like most dApps on other blockchains, you would need to connect to them using any supported wallet for that particular application. Likewise, making and approving transactions is mostly the same as you would normally do with Ethereum or Binance Smart Chain.
You will receive a request to complete the transaction, which would require payment of transaction fees in the form of SOL, the native token of the Solana blockchain. But don’t fret because the transaction fees are extremely low, sometimes costing less than a penny!
For example, with a SOL of $45, adding a token to your wallet would cost 0.002039 SOL, or about $0.09. An order on the Serum Dex would cost about 0.02 SOL, or about 90 cents, while a normal exchange transaction (with Raydium) would cost 0.000005 SOL, or about $0.0002! Compared to Ethereum, which can sometimes reach more than $10 for a simple permit transaction, even one SOL unit will last for quite a while.
Learn Crypto Trading, Yield Farms, Income strategies and more at CrytoAnswers
https://nov.link/cryptoanswers
Comments are closed.